Scott Finlay, DDS, FAGD, AAACD
Every case requiring comprehensive functional and esthetic treatment is treated four times. The first step is to visually assess the current positions of the teeth and supporting structures relative to how they appear in the face. Understanding the concepts of complete dentistry and the functional matrix, the clinician begins each of these cases with the end in mind. Dentists can then virtually create a vision of how they would like to manipulate those structures to enhance their appearance and function. Through the use of specifically calibrated photographic views, a matrix is designed that will position these players (the teeth) relative to the curtain that encircles them: the lips. What changes seem appropriate in incisal edge position and incisal plane or reveal through various facial expressions? The second time the case is treated is through the model analysis and diagnostic wax up. Through the use of mounted study models, the clinician can study the functional relationships that currently exist and make the anticipated modifications on the stone casts to test the design. Can the desired positions and contours that have been envisioned through photographic analysis be achieved in a way that creates functional occlusal harmony? The third step is to take this dental blueprint to the patient to create prototype restorations that replicate the design matrix accomplished in wax on the diagnostic models. Only after the evaluation and approval of these prototype restorations can the dentist definitively restore an individual’s smile in a predictable way.1
There are five primary purposes for photographic records:
- Documentation: a snap shot in time documents the current conditions of the mouth from tissue architecture to tooth position, condition, and contour. It can aid in risk assessment in evaluating the progression of disease. Archived images, just like dental x-rays, allow the clinician to compare the patient’s current state to the time when images were recorded.
- Diagnosis: an evaluative tool to assess the position of the teeth relative to the natural planes and landmarks of the face and lips. The incredible resolution of cameras today often reveals the earliest signs of instability and deterioration, and indications for treatment.
- Communication: a means to communicate with both the dental laboratory and the patient. Shades of adjacent teeth, stump shades, and shade tabs are essential information for the ceramist, adding personality and color to the stone models on the lab bench. For patients, these records are educational, allowing them to take ownership of their disease and facilitating the acceptance of solutions leading to the best treatment.
- Self Assessment Tool: a way to evaluate the success and shortcomings of treatment. In the past dentists could rely only on the memory of cases, which is always impacted by bias and ownership of the treatment provided. Photographs have no bias, and it can be humbling, yet rewarding in truly assessing the results, helping dentists learn to become better at what they do, and have a more realistic vision of where cases are headed before beginning.
- Education and Marketing: patient education is critical to treatment success. It is only after allowing patients to see the evidence-based indications for treatment that they can truly take ownership in the process of improving their oral health. The ability to show patients similar cases that the dentist has treated, in the format of before and after images, empowers the patient to make better-informed treatment decisions.2
Equipment
The first step in recording diagnostic-quality images is to acquire a professional grade camera that is set up for macro photography, producing resolution of a minimum of 5 megapixels. Creating quality images with some level of flexibility requires a digital single lens reflex camera (DSLR). However, without training and experience in photography, the complexity of camera systems and settings can be intimidating. Fortunately, there are many packaged systems available that are ready to go right out of the box. When pairing a lens to a DSLR camera body, it is important to be able to accommodate a minimal magnification range from 1:1 to 10:1. The images used in a practice are repetitive, therefore the camera settings, which are often provided for the dentist by the resellers, are usually limited to just a couple of simple options.
Despite the high resolutions of many of the available camera bodies, the light source is a key determinant of the quality of the image captured. Currently, there are two popular flash designs for dental camera systems: a ring flash and twin flash systems. A ring flash is an excellent lighting source for the inexperienced user: it creates consistent results, providing even lighting throughout the field. The disadvantage is that it can flatten out the depth of contours and obscure surface anatomy and color. A twin point flash requires a slightly more experienced user, but it has the advantage of capturing more surface detail, characteristics, and color, while providing good depth of contours and anatomy3 (Figure 1).4
The dentist will need a few props to help frame the subject. These include a non-distracting background for extraoral shots, and retractors and mirrors for intraoral ones. The background can be simply a blue, grey, or black cloth draped on a flat backing such as a foam board or frame, and can be held behind the patient’s head while the images are being recorded. While retractors can come in a variety of forms and shapes, usually a clear simple retractor in 2 sizes is best for photography. Opaque retractors tend to be reflective and distracting in images. Wire retractors are useful for occlusal mirror shots and tight 1:1 images. Contrasters are also effective in retracted views to accentuate incisal characteristics and inclusions, and define levels of translucency.
Finally, the dentist will need some means of viewing the images in a way that allows for adequate evaluation. Images can be displayed on a large high-definition computer screen, or even projected with a LCD or DLP projector. When the dentist has the opportunity to critically evaluate his or her own restorations—at high resolution and significant magnification—the reality, successes, and limitations of treatment can truly be appreciated.
Photographic Imaging Protocol
It is important to develop a meaningful protocol that is reproducible from patient to patient and from one point in time to another to facilitate the process of comparison, evaluation, and learning. Implementing this protocol will allow the dentist to compare images taken today to those recorded in the past (Figure 2). Each image in the sequence of views has a purpose both diagnostically and for documentation purposes, and it is critical for the dentist to understand the reasons for these views. Although additional images may be desired, there is an accepted basic template that will provide the dentist, patient, and laboratory technician with the information to achieve a successful result. Developing a disciplined protocol will facilitate consistency in results. These images should be recorded for any case requiring significant changes to tooth contour or position, and even in cases where no treatment is planned as a means of creating baseline data.
Previously, ratios that describe magnification were based upon film technology. The ratio typically compared the space that the image occupied on the actual piece of film relative to the realistic size of the object. For example, in a 2:1 ratio, the size of the actual object is twice what it would occupy on the film. However, with digital photography the size of the sensor that captures the image is significantly smaller than the standard 35 mm film size. The difference in magnification between 35 mm film and digital is approximately 1.5 X. Therefore, for this example, interpolation for a digital image of similar magnification would typically require a 3:1 setting on the lens.5
The American Academy of Cosmetic Dentistry (AACD) has a standard protocol composed of 12 views used as an assessment tool in evaluating the indications for and results of treatment: this is an excellent outline to begin documentation. These 12 views are used in a before-and-after format with the American Board of Cosmetic Dentistry (ABCD) in the evaluation process for accreditation. For the purposes of this article, images should be stored in a jpeg format, however for accreditation, images must be captured in a RAW (digital negative) format. These same views are important in documentation and diagnosis by the dentist, whether or not the case is to be used in the process of accreditation.6
In addition to the 12 views outlined by the AACD, there are additional views that are particularly informative in the diagnostic phase of treatment:7
- Rest position
- “E” smile
- Tipped down smile
- Profile smile
- Teeth in maximal interception
- Shade tabs placed in the same plane of teeth to be evaluated (stump shades, adjacent tooth shades, etc)
- Images of prototype restorations: in the course of treatment, the same series of images of the provisionals will give the dentist and laboratory technique valuable information for additional detailing of the definitive restorations
- Black and white photography: with the click of the mouse, software management of the images converts a full color image to a black and white image, which is an effective tool in evaluating surface texture and value
Description of Views (Figure 3)
- Full face view: Full-face views should show from the top of the patient’s head to the chin with a natural smile. The image should be captured from directly in the front of the patient, centered in the same horizontal plane. Diagnostically, the focus is evaluation of the midline, incisal, and occlusal plane, reveal, and general esthetic presentation.
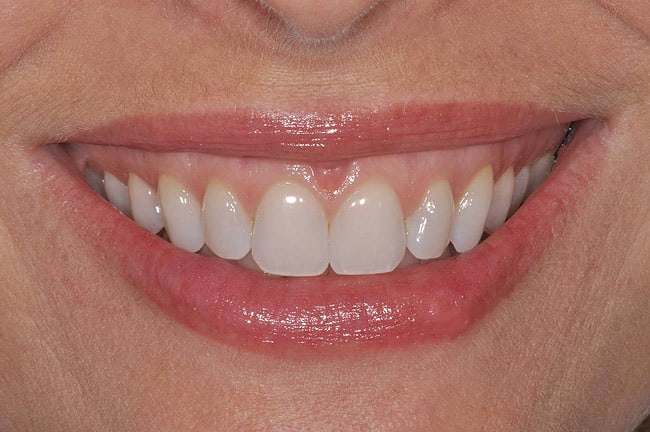
- Anterior relaxed smile: This should be a natural, full smile: not partial or a grimace. Magnification should be 3:1 with a DSLR camera. Diagnostically, the focus is the buccal corridors, incisal edge position relative to the lower lip (smile line), and gingival display.
- Lateral left and right relaxed smile: This is not a profile view, but a lateral view with a perpendicular from the lateral incisor. The contra lateral central incisor and possibly the lateral incisor should be in view. Diagnostically, the focus is the posterior extent of the reveal, gingival display, and incisal edge position.
- “E” smile: This is an anterior view with the patient smiling while saying the letter “E.” Diagnostically, smile design would suggest that the incisal edges of Nos. 8 and 9 should be 50% to 80% of the distance between the upper and lower lips. This position can ultimately be manipulated relative to age appropriate attrition and lip mobility. This view is also helpful in determining the highest position of the upper lip.
- High angle smile: This is an anterior smile view taken from a superior angle, approximating 30?45 degrees from the occlusal plane. Diagnostically, the focus is the arch form relative to the lower lip. The incisal edges of the anterior teeth should be just lingual to the vermillion border of the lower lip to facilitate lip closure.
- Profile smile: This is a close up profile of the natural smile focusing on the emergence profile of the facial aspects of the teeth relative to the facial planes and the incisal edge position in relation to the lower lip.
- Rest position: This is a relaxed lip position used to evaluate the amount of tooth display at rest. A youthful, esthetically pleasing display may be approximately 2 mm to 4 mm. This will vary due to tooth wear and age. This view is helpful, in coordination of other views, in choosing appropriate incisal length.
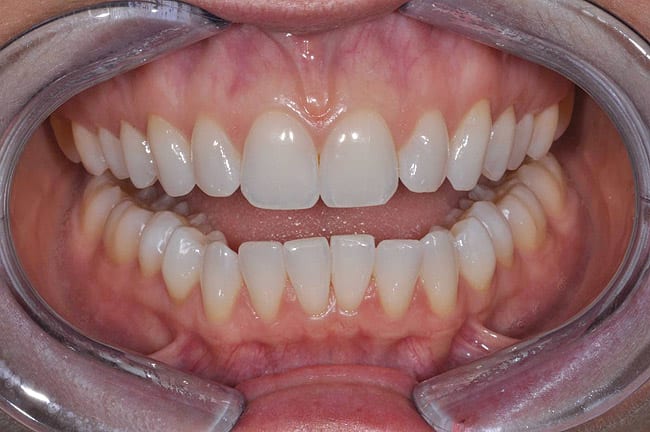
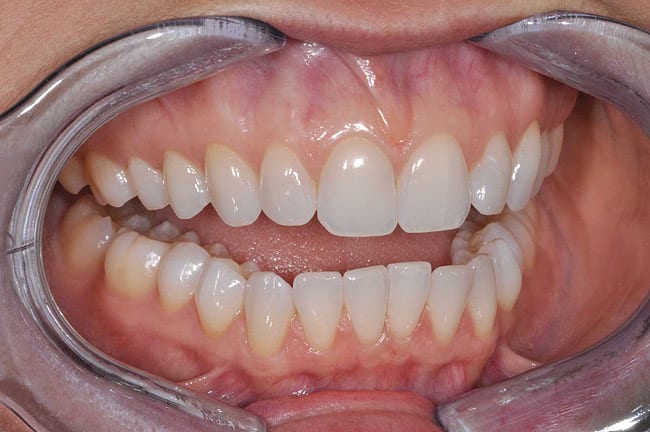
- Retracted views: These views are taken at a 3:1 magnification with a DSLR camera. They mimic the criteria of the anterior smile and lateral views, and are captured with teeth slightly separated and in maximal intercuspation. Diagnostically, the focus is on gingival architecture, intra-arch relationships of the teeth, some macro elements of smile design, and occlusal and incisal plane evaluation.
- Occlusal views: Occlusal views are challenging to capture. The image should include the occlusal surfaces of all the teeth, as well as the labial contours of the anterior teeth. Diagnostically, this is often overlooked, but it is very beneficial in evaluating anterior restorations relative to facial anatomy, embrasures and line angles that affect reflective zones, and visual proportions of teeth when viewed from the anterior.
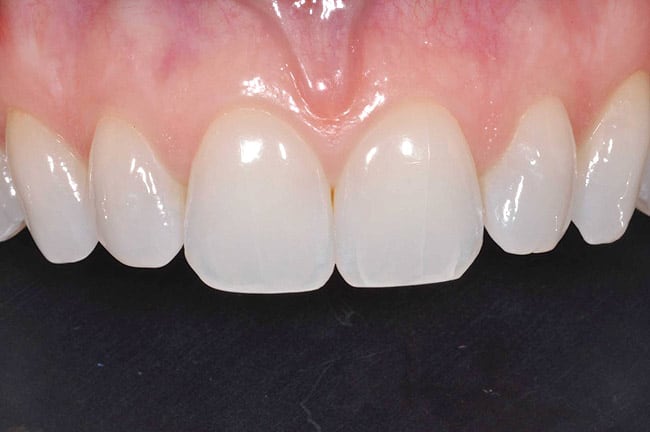
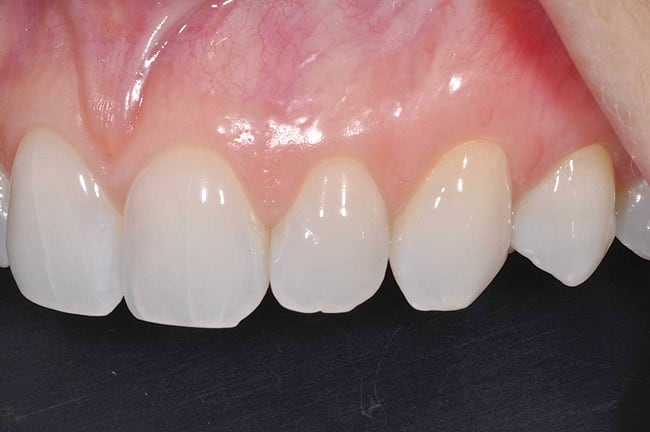
- Retracted anterior and lateral 1:1: These very dramatic views provide an extreme close up view of the teeth. Only 4 to 6 teeth should be visible in this view. Contrasters (dark backdrop behind the lingual surfaces of the teeth) are an effective tool to help evaluate nuances of incisal effects and translucency. Other microesthetic elements related to texture and surface anatomy can also be evaluated.
Conclusion
Only a few decades ago, it would have been difficult to appreciate how indispensible digital photography would become in modern dentistry: the standard for photographic documentation was limited to a film-based process that almost seems archaic from the current perspective. While previously it would take days to process images, now with digital photography the images are instantaneous, providing a powerful tool for diagnosis and treatment planning. Of all the technologies that have surfaced in dentistry in the past decade, digital photography is one of the most important tools to help dentists move their practice to the next level: to provide true excellence in patient care in today’s environment, excellent digital photographic records are a must.
References
1. Dawson PE. Functional Occlusion: From TMJ to Smile Design. St. Louis, MO: Mosby; 2007.
2. Cranham JC. Digital Dental Photography [DVD]. St. Petersburg, FL: Dawson Masters Library Vol 8; 2007.
3. McLaren EA, Terry DA. Photography in dentistry. J Calf Dental Assoc. 2001;29(10): 735-742.
4. Photomed International Web site. https://www.photomed.net. Accessed July 20, 2009.
5. Terry DA. Aesthetic and Restorative Dentistry. Stillwater, MN: Everest Publishing Media; 2009:492-493.
6. American Academy of Cosmetic Dentistry. A Guide to Accreditation Photography. https://www.aacd.com . Accessed July 20, 2009.
7. Bay View Dental Laboratory. Pretreatment/Case Planning Photo Checklist. https://www.bvdl.com/photo_communication.pdf . Accessed July 20, 2009.
About the Author
Scott Finlay, DDS, FAGD, AAACD
Faculty, Dawson Academy
Private Practice
Annapolis, Maryland


